
A nail-care kit is only useful when its tools are ready to use. A clipper can look shiny while still holding small pieces of nail around its jaws or hinge. This guide separates the everyday cleaning check from disinfection and salon sterilization, then turns those distinctions into a manageable home routine. It concerns ordinary personal grooming tools, not a medical instrument-processing protocol or a treatment for an infected nail.
Start with the tool, not the strongest chemical
The CDC advises cleaning nail grooming tools, including clippers and files, before use. Start by identifying what you actually own: a reusable metal clipper, nail scissors, a washable file or an item intended for limited use. Find the maker’s care instructions before choosing a cleaning product. A method described for one material is not automatically suitable for a coated surface, glued component or different kind of file.
Put the tool somewhere you can see its working parts clearly. Look for remaining clippings, visible dirt, damaged edges or a hinge that does not move normally. This is a readiness check, not a test for microorganisms. If you cannot tell how an item should be cleaned, keep it out of the ready-to-use kit while you ask the manufacturer. A small kit of usable tools is more practical than a full case of uncertain ones.
Cleaning, disinfection and sterilization are different jobs
CDC household guidance distinguishes cleaning away dirt and impurities from disinfecting to kill most germs. Cleaning comes first because remaining material can interfere with the next step. A shiny surface does not identify which job was completed.
| Term | What to understand | What it does not prove |
|---|---|---|
| Cleaning | Removal of dirt and impurities | A tool is not automatically disinfected because it looks clean |
| Disinfection | Following an appropriate disinfectant’s directions | A quick wipe is not evidence that every required step was followed |
| Sterilization | A separate requirement named in CDC guidance for shared commercial nail tools | A home cleaning or disinfection routine should not be described as salon sterilization |
Keep the setting visible when reading advice. A personal kit at home and tools passed between salon clients raise different processing questions. This article does not turn a home routine into a substitute for the standards that apply to a commercial service.
Make the before-use cleaning check repeatable
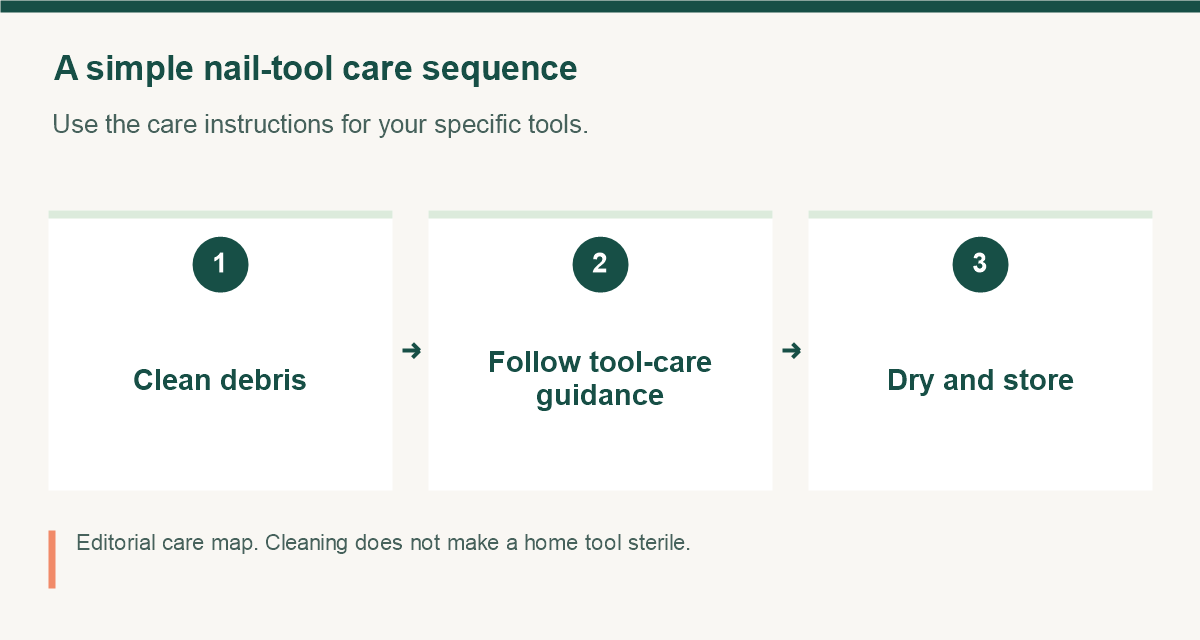
Arrange a clean work area, the tool’s instructions and the supplies appropriate for that tool. Follow its cleaning method to remove visible material rather than applying a chemical over debris. Inspect the accessible edges and moving parts again afterward. Use a simple sequence that you can repeat instead of changing products each time a different online tip appears.
- Identify the tool and whether its maker says it is reusable.
- Check its condition and remove it from the ready kit if it is damaged.
- Use the maker’s appropriate cleaning method to remove visible debris.
- Complete any further recommended care step before returning it to storage.
Make the storage distinction obvious: a place for tools waiting to be cleaned and a place for tools ready to use. A labeled compartment or a short checklist may be enough. The point is to avoid mistaking yesterday’s put-away step for today’s completed cleaning check.
Keep the AAD’s home disinfection advice precise
The American Academy of Dermatology’s nail-trimming guide recommends disinfecting nail tools monthly. Its described method uses a small scrub brush soaked in 70–90% isopropyl alcohol to scrub nail clippers or nail scissors, followed by rinsing the tools in hot water and drying them completely before storage. The instruction describes a brush method; it does not supply a timed alcohol-soaking cycle for the clippers themselves.
Do not replace that description with an invented soak time or combine it with a different disinfectant recipe. For any cleaning or disinfecting product, follow its label and the tool maker’s compatibility instructions. CDC safety guidance says not to mix products or chemicals and to follow stated contact times when a product requires them.
Put away a kit you can understand next time
Complete the drying step before storage, as the AAD advises. Then make the kit easy to review: keep the product directions available, identify who uses each item and separate a damaged or uncertain tool from usable ones. If an item is designated single-use, do not invent a reuse process because it still looks intact.
Consider a realistic morning: you have a snag, little time and a crowded drawer. A ready clipper in a clearly assigned place avoids a search through loose tools. If the only available item needs cleaning, do that task rather than assuming a wipe on a towel makes it ready. Our simple nail-care routine explains the grooming habits around the kit; this guide focuses on the tools themselves.
Know when the question belongs to a salon or clinician
The AAD’s manicure and pedicure guidance recommends looking at a salon’s cleanliness and asking how its tools are cleaned. It also suggests considering your own tools if you receive frequent services. Bringing a personal set does not answer every hygiene question about the workstation or service; ask what will happen to that set before it is used.
The CDC identifies pain, swelling around a nail and nail thickening as possible signs of infection that may need medical care. Do not turn a tool-cleaning experiment into a response to a concerning nail change. Set the grooming task aside and ask an appropriate health professional about the nail. Cleaning a clipper and assessing a nail problem are separate decisions.
Sources & further reading
- CDC: Healthy Habits — Nail Hygiene ↗
- American Academy of Dermatology: How to trim your nails ↗
- CDC: When and How to Clean and Disinfect Your Home ↗
- American Academy of Dermatology: Manicure and pedicure safety ↗
Manufacturer information, when cited, is a commercial source. It does not establish that a finished product is clinically effective.